译:一个简单技巧,让你的截图缩小 80%
原文: https://about.gitlab.com/blog/simple-trick-for-smaller-screenshots/
作者: James Ramsay
译者: Gemini 2.5 Pro
如何用 pngquant 和 zopfli 自动压缩截图
更新于 2020-02-03: 增加了 macOS Automator 的设置说明。
我每天都会截图,在 issue、博客文章、邮件和 Slack 中与人分享。我希望这些截图清晰、高分辨率,而且很重要的一点是,文件尽可能小。文件小意味着上传和下载都很快。当我在写博客或文档时,这一点尤其重要。
下面是对 PNG 压缩的简要介绍,以及将整个过程完全自动化的说明。
当你在 Mac 上截图时,图片会以 PNG-32 格式保存,它支持 1600 万种不同颜色和透明度。这意味着截图会完美捕捉屏幕上的每一个像素,但每个像素都有红、绿、蓝和 alpha (透明度) 四个 8 位通道,这使得文件非常大。如果你感兴趣,可以用 pngcheck 亲自验证一下。
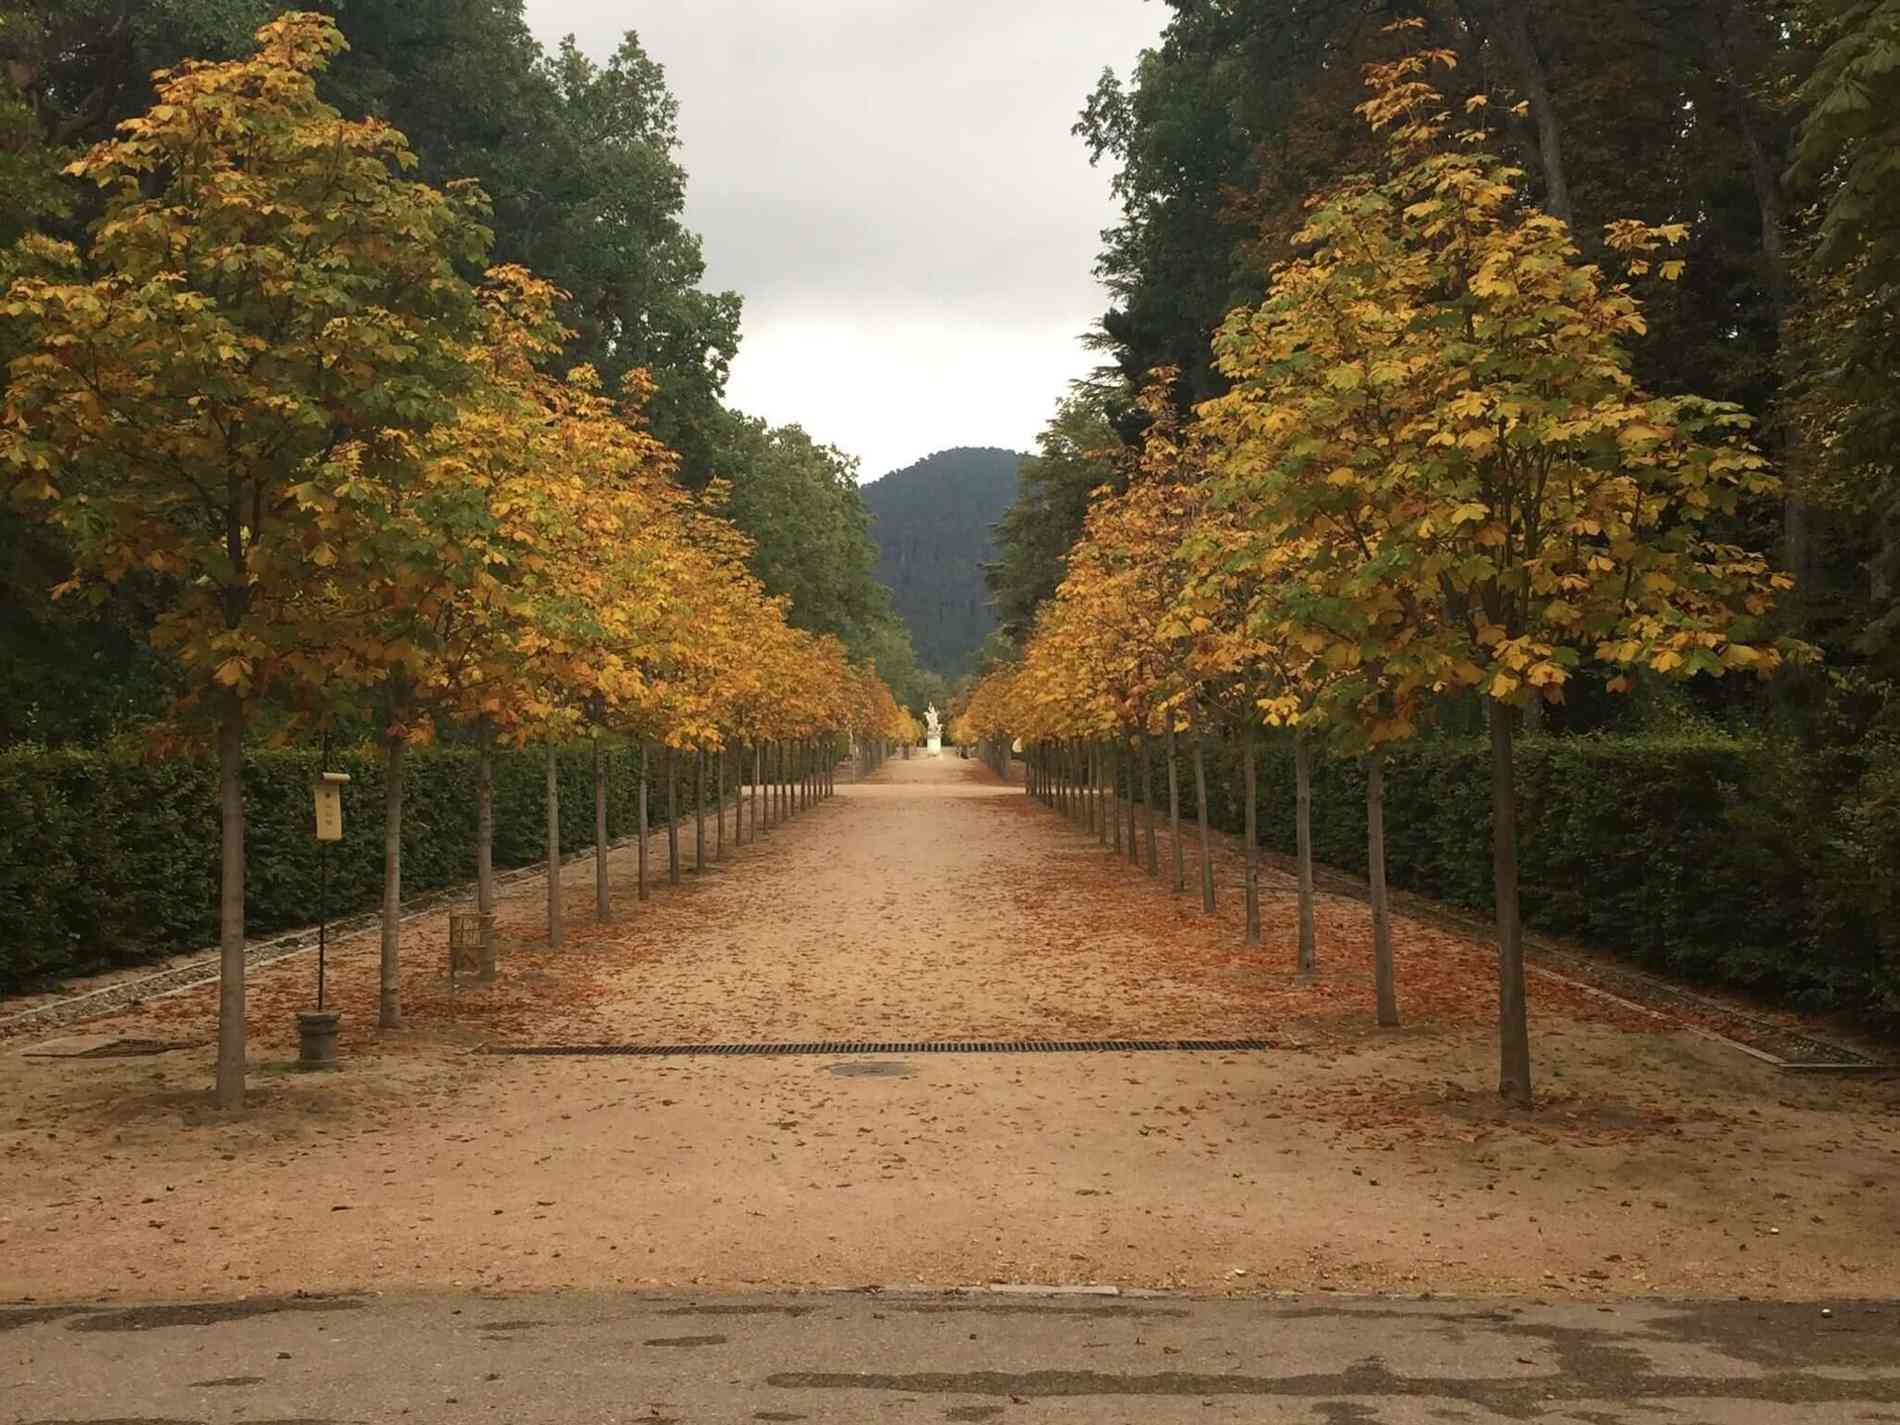
在实践中,我截图的对象通常是按钮和表单,而不是照片。照片可能需要 1600 万种颜色,但截图并不需要。所以我们可以利用 PNG-8 格式,它只用一个更紧凑的 256 色调色板。
有损压缩:颜色量化
第一步是减少截图的调色板。这是一种有损压缩,称为颜色量化,它会减少图像中不同颜色的数量。pngquant 这个命令行工具正是为此而生。如果你用过广受欢迎的 ImageAlpha,那你其实已经用过 pngquant 的库了。
# Install pngquant using Homebrew
brew install pngquant

# Quantize 32-bit RGBA PNG to 8-bit (or smaller) RGBA-palette
# pngquant [number of colors] [options] input.png
#   --skip-if-larger  only save converted file if they're smaller than original
#   --strip           remove optional metadata
#   --ext=.png        set output filename to be same as input filename
#   --force           overwrite existing output files
pngquant 256 --skip-if-larger --strip --ext=.png --force example.png
下面的截图展示了不同程度的调色板缩减效果。
| PNG-32 (134KB) | 256 colors (42KB) | 128 colors (39KB) | 64 colors (38KB) |
|---|---|---|---|
| Source PNG-32 | 256 colors | 128 colors | 64 colors |
| 32 colors (37KB) | 16 colors (29KB) | 8 colors (22KB) | 4 colors (16KB) |
| — | — | — | — |
| 32 colors | 16 colors | 8 colors | 4 colors |
我发现,对于大多数截图,你可以放心地把调色板减少到 64 色,而图像质量的差异几乎看不出来。如果你经常截取渐变或更复杂的图像,你可能需要坚持使用 256 色,以避免出现明显的失真。
无损压缩:DEFLATE
PNG 图像文件格式内部使用 DEFLATE 压缩来增加一层无损压缩,但大多数 PNG 库并没有实现极致的无损压缩。这就为我们提供了进一步减小文件大小的机会。
2013 年,Google 发布了 zopfli,声称与 zlib 相比,能将压缩率再提升 3-8%。这个提升的代价是:需要多等 1-2 秒。(查看压缩后的图像时,没有任何解压性能损失)。
# Install zopfli using Homebrew, which includes zopflipng
brew install zopfli

# Optimize PNG compression
# zopflipng [options] input.png output.png
#   -y  do not ask about overwriting files
zopflipng -y example.png example.png
相比于颜色量化带来的巨大节省,改进无损压缩提供的缩减要小得多。但在一个有很多图片的页面上,这些边际收益累加起来,也是值得的。
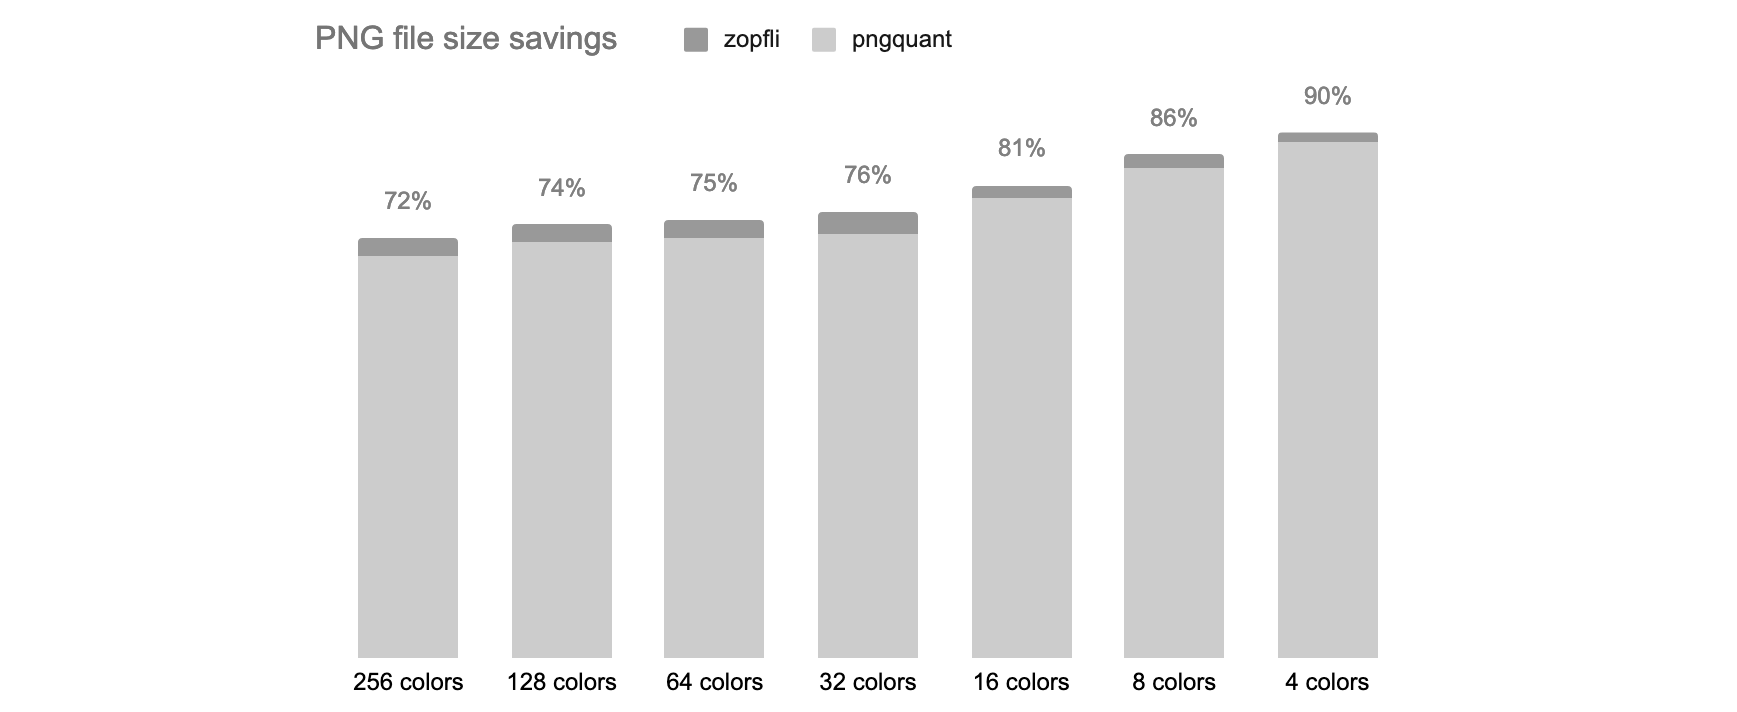
图表:文件大小节省情况
自动化
The trick is to make this happen automatically every time I capture a screenshot using Hazel or Automator. This allows you to run commands based on file events, like every time a new screenshot is added to a directory.
诀窍在于,每次我截图时,都通过 Hazel 或 Automator 让这一切自动发生。这些工具可以让你基于文件事件运行命令,比如每当有新截图添加到某个目录时。
另一个额外技巧是,创建一个专门的截图目录,这样它们就不会把你的桌面搞得一团糟。这也很简单:
# Create a Screenshots directory in the current users Home directory
mkdir -p "$HOME/Screenshots"

# Configure macOS to capture screenshots to this location
# If you want to revert this change, and save screenshots to your desktop,
# instead use "$HOME/Desktop"
defaults write com.apple.screencapture location "$HOME/Screenshots"
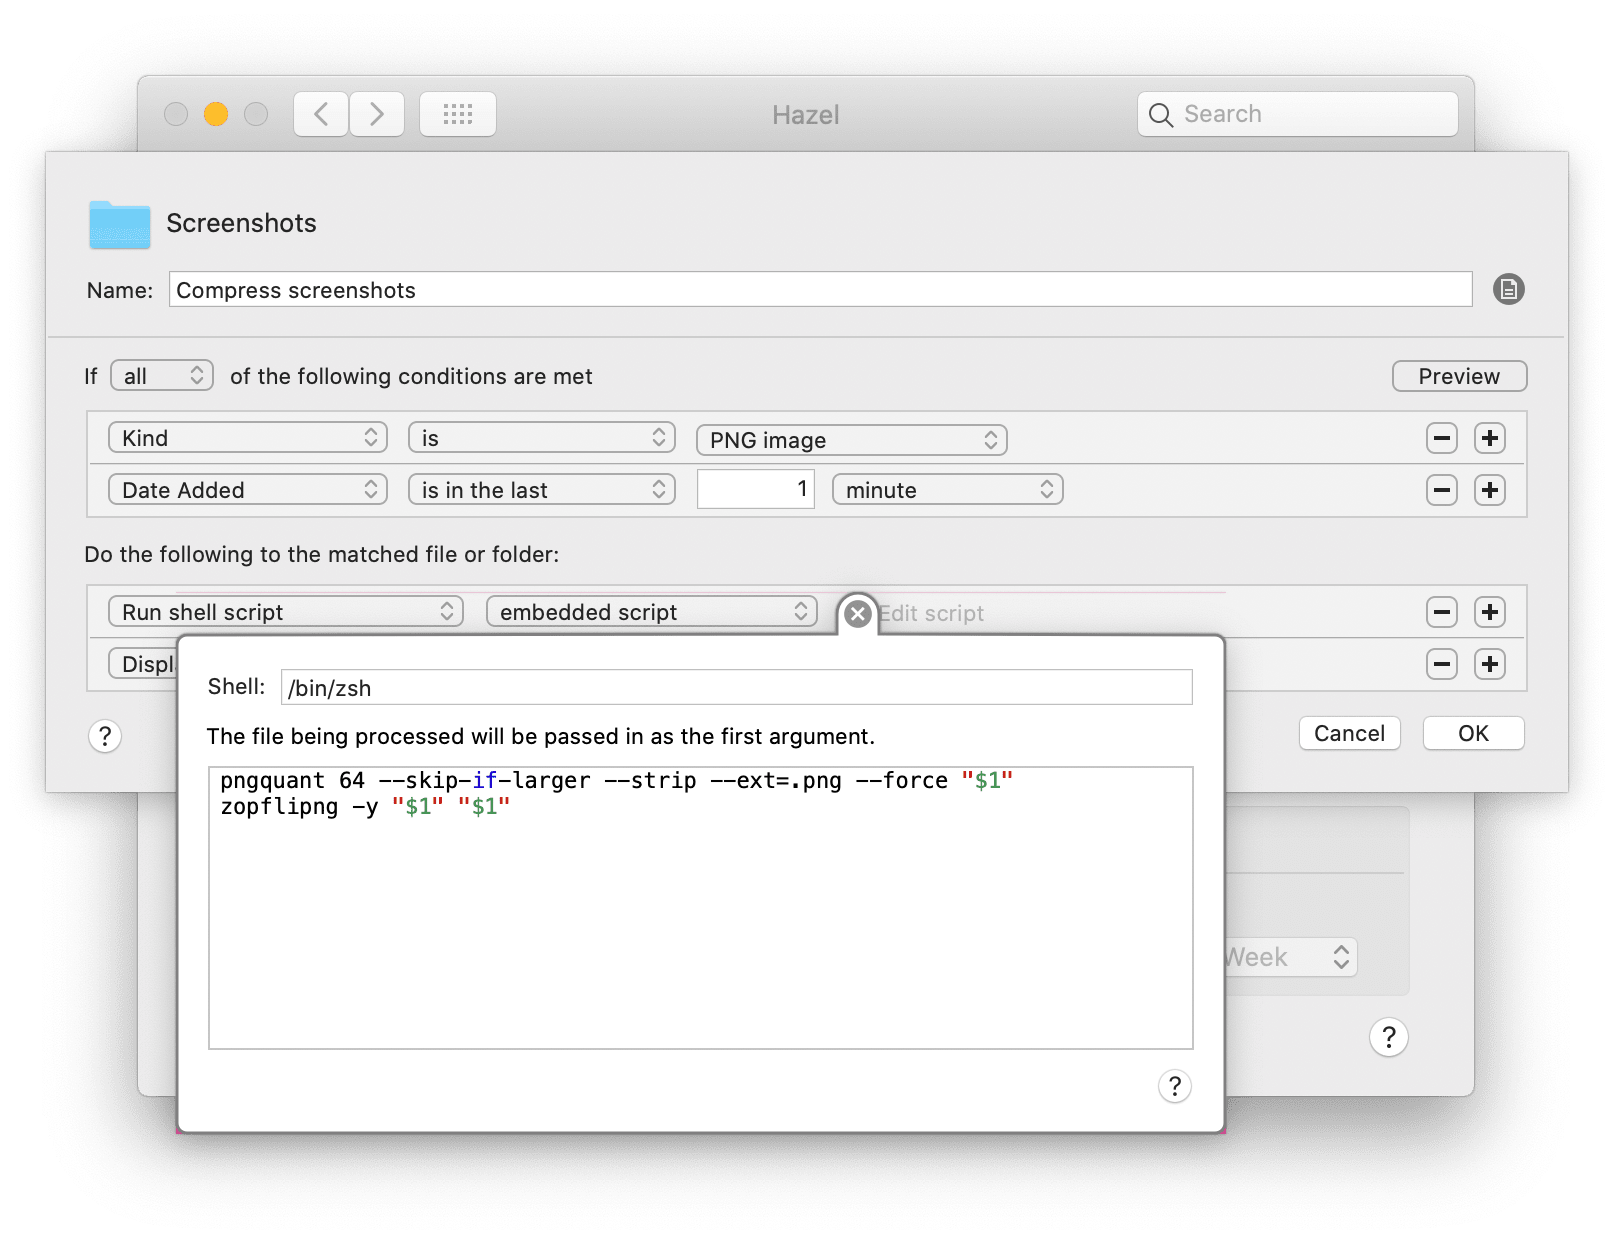
使用 Hazel,添加你新建的截图文件夹,并创建一条新规则,在文件被添加时对其进行压缩。结合上面的命令,并使用 $1 语法来访问 Hazel 传递的文件名参数,最终的脚本是:
pngquant 64 --skip-if-larger --strip --ext=.png --force "$1"
zopflipng -y "$1" "$1"
或者,使用 Automator,创建一个新的文件夹操作,从截图文件夹接收通知。添加一个运行 Shell 脚本块,并确保将输入作为参数传递。结合上面的命令,这次使用 $@ 语法来处理多个参数,并为 pngquant 和 zopflipng 使用绝对路径,最终的脚本是:
for f in "$@"
do
  /usr/local/bin/pngquant 64 --skip-if-larger --strip --ext=.png --force "$f"
  /usr/local/bin/zopflipng -y "$f" "$f"
done
这是我的配置截图。
| Hazel | Automator |
|---|---|
| Hazel 截图压缩规则 | Automator 截图压缩操作 |
我的最后一个技巧是,把截图文件夹添加到 Dock 中,方便访问。只需把截图文件夹从 Finder 拖到 Dock 上即可。
总结
PNG 格式非常适合截图,但默认输出的文件对于在互联网上分享来说太大了。与其手动使用 ImageAlpha 和 ImageOptim 来压缩截图,不如用 Hazel 将这个过程自动化,从而稳定地获得 80% 的文件大小缩减。
如果你知道其他压缩技巧,或者适用于 Windows 或 Linux 的替代方案,欢迎在评论区告诉我!